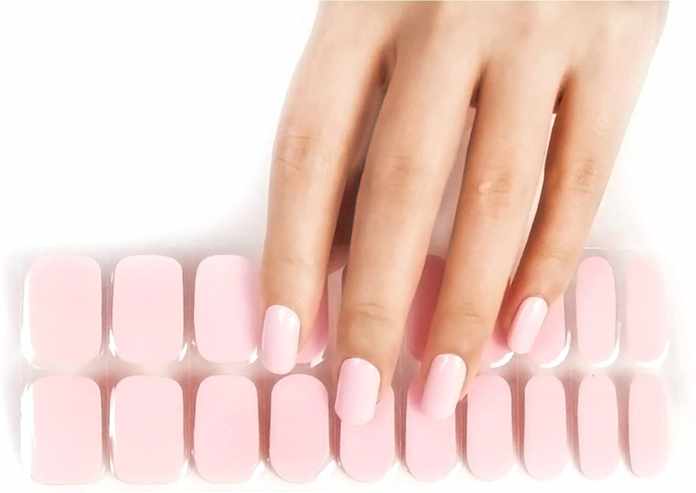
Once you opt for gel nails, it’s kind of hard to go back to anything else. They’re sturdier. They don’t chip in a matter of days, and they simply look better. They’re hard and they’re shiny. If you’re familiar with gel nails, you may have already begun hearing of semi cured gel nails through the grapevine. Maybe that’s why you’re here. Or maybe you stumbled here by mistake as you scourged the web for gel nail ideas and inspo, and your life is about to be changed by the simple powers of sweet serendipity. Either way, let me introduce you to semi cured gel nails and open your world to the wonders of a great DIY manicure that, believe it or not, anyone can do. No skills required.
Table of Contents
What Makes Gel Nails Different?
First of all, semi cured gel nails are still gel nails. So briefly, let’s go over what makes gel nails different from regular, old-fashioned nail polish. Gel nail polish is painted on somewhat similarly to regular nail polish, but after that, the process differs. Rather than air drying, gel nail polish has properties that require it to be cured under a UV light. This makes it harden in a short matter of time, and once it’s hard, it’s done. There will be no scratches, no chipping as you reach into your purse to pay at the salon. It’s cured and it’s tough, and it’ll last longer than the traditional nail polish as well.
Gel Nails vs. Semi Cured Gel Nails
While gel nails are tougher and longer lasting than traditional nail polish manicures, gel manicures do have their downsides, too. First, the process requires at least three coats of polish: a primer for the gel, the gel polish itself, and a glossy top coat. Also, each of these three layers needs to be cured before moving to the next layer, and the curing process under a UV lamp isn’t exactly one you want to extend in any way. Though the curing process is quick, you still want to spend as little time with your hands under a UV lamp as possible, so three sessions under the UVs isn’t exactly ideal, especially if it’s possible that you could cut that down.
Semi cured gel nails allow you to do just that. It’s the same polish, and the same result, but instead of three coats of wet polish you have to paint on, the process involves adhesive nail strips that are already 60% cured. Two of those three UV sessions are cut from the equation, because 60% of that curing has already been done. You place the already semi cured gel nail strips on each nail, then you put them under the lamp for the final curing process. Viola. You’re left with gel nails, you’ve minimized the amount of time your hands just spent under a UV light, and nobody can tell the difference.
How Do You Apply Semi Cured Gel Nails?
The application process for semi cured gel nails is perhaps the best part. As I just mentioned, semi cured gel nails come as adhesive nail strips. That means there’s no nail painting involved. It’s clean, it’s quick, and it’s easy. It just involves a UV gel nail lamp, a set of semi cured gel nail strips, and a few simple steps.
- You’ll want to begin by cutting and filing your nails to your desired shape.
- Then, clean off your nails to eliminate any moisture or dirt. This helps the strips stick better once applied.
- Next, bring in the gel nail strips. There are a variety of shapes and sizes, so pick the ones that fit each nail the best and stick them on your nails, leaving a tiny space between where the strip ends and your cuticle.
- The sheet that the nail strips come on will also have markings that indicate which side of the nail strip is the top and which side is the bottom, so you know which end should go near your cuticle and which end is out in the air.
- Smooth the nail strip around the edges so it’s snug and stuck on the nail.
- Then, get rid of the excess nail strip so it’s fit to just the size of your nail. You can do this using nail clippers or scissors, or you could tear it with your hand, or you could rub it against a hard surface. The strips are flexible and easy to tear, making this process simple.
- File your nails once more now that the strips are on to smooth out the edges.
- Cure them. Place your nails under your UV gel nail lamp for just about a minute, or until they’re fully hardened and shiny. Certain nail strips may take a little longer, such as ones with jewels or gemstones on them.
- If necessary, smooth and file nails once more.
Removing Semi Cured Gel Nails
Semi cured gel nails are relatively easy to get off. Most kits come with a tool to help you remove the strips, and you’ll just have to use nail polish remover or acetone solution to help get the job done. The tool is typically a small wooden stick that’s pointed at the end, or something else of similar shape. To remove the nail strips, you simply dip the tool in solution and begin to nudge it around the edge of the nail closest to your cuticle. You’ll want to go from your cuticle towards the end of the nail, keeping in direction with the cuticle to avoid nail damage. Eventually, the tool will get under the nail, the strip will lift and the entire thing will just come off. To finish off, you’ll want to use a cotton ball dipped in acetone solution to wipe off any remaining adhesive on the nails.


